Connect your Meta Ads account
This guide will walk you step by step to connect your Meta Ads account to CentrAds.
Prerequisites before connection
Before connecting your Meta Ads account to CentrAds, make sure you meet the following requirements:
1. Create a Meta Business Account
Go to business.facebook.com, click ‘Create Account’, fill in your business name, name, and email address, then verify your email to activate your Business Account.https://business.facebook.com
2. Have an active and valid Meta Ads Account
Go to Business Settings (top right ⚙️). Add your Facebook Page and Instagram Account under ‘Accounts’. Create a new Ad Account under ‘Ad Accounts’ → ‘Add’ → ‘Create a New Ad Account’. Choose a name, timezone, and currency. Assign yourself the Admin role and link your Facebook Page and Instagram Account to the Ad Account.
3. Add team members (optional)
If you’re working with a team or agency, add members and assign roles: Business Settings → People → Add.
4. Set up a validated payment method
Go to Business Settings → Payment Methods → Add Payment Method, add your card or PayPal, then set it as Primary. If needed, check the Meta guide:https://www.facebook.com/business/help/208949576550051
5. Ensure your Ad Account is active and compliant
Your account must be active and in good standing. Check this in Ads Manager → Settings → Ad Account Setup, and ensure there are no restrictions or policy violations.
6. Be up to date with your invoices
Go to Billing → Transactions in Ads Manager and ensure there are no unpaid invoices or outstanding balances.
7. KYC validation (if necessary)
Some accounts require identity or business verification. Complete this in Business Settings → Security Center before connecting to CentrAds.
Step 1 : Access My Platforms
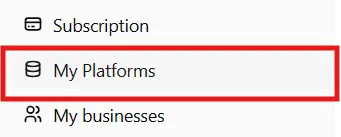
- Once all prerequisites are met, go to the ‘My Platforms’ section in the left menu of your CentrAds dashboard.
Step 2 : Connect Meta Ads

- On the My Platforms page, locate the Meta Ads row and click the ‘Connect’ button on the right.
Step 3 : Authorize CentrAds
- You will be automatically redirected to a Facebook authentication page.
- Important: Please accept all requested permissions. CentrAds requires these to manage your campaigns and access performance metrics across Facebook and Instagram.
Step 4 : Check connection status
- After authorization, you’ll be redirected to the My Platforms page.
- Your Meta Ads connection status will be displayed:
- Valid account: Your account is properly connected and ready to use.
- Invalid account: An error message will specify what went wrong.
- If your account is not validated, check the error message, fix the issue, and click the refresh button next to your account.
Step 5 : Link your account to a Business
- Last step — associate your Meta Ads account with one of your CentrAds Businesses.
- In the My Platforms section, use the dropdown next to your Meta Ads account to select the Business you want to link it to.
- For more details on Business management, check our guides:
You're ready
Congratulations! Your Meta Ads account is now connected to CentrAds and linked to your Business. You can now create and manage your Facebook & Instagram ad campaigns directly from your CentrAds dashboard.
Need help?
If you encounter difficulties connecting your Meta Ads account, our CentrAds team is available to assist you:
Contact: admin@centrads.com
Estimated time: 2-10 minutes